A beer dispenser is an essential tool for anyone looking to enjoy draft beer at home, in a commercial setting, or at events. When setting up acommercial beer dispenser installation, having the right beer accessories is crucial to ensure smooth operation and performance. This guide will take you through everything from the basics to installation, troubleshooting, and maintenance, providing you with all the knowledge you need to keep your beer tap system running smoothly for years to come.
Top Selling Products
Understanding the Basics of a Beer Dispenser
A beer dispenser is a device designed to serve draft beer directly from a beer keg and dispenser system. It is typically used in bars, restaurants, homes, or at events to provide a consistent flow of beer at the right temperature and carbonation level. There are several types of beer dispensers, ranging from home beer tap systems to larger, more complex commercial beer dispensers.
The beer tap system is the heart of any draft beer dispenser. It allows you to pour beer directly from a keg, ensuring that the beer remains fresh and carbonated. A beer dispenser faucet controls the flow of beer from the keg and ensures it is dispensed correctly.
The main components of a beer dispenser include:
Keg: Hold the beer.
CO2 Tank or Gas Pump Beer Dispenser: Provides carbonation and pressure.
Beer Line: The tube through which the beer flows from the keg to the faucet.
Beer Faucet: Dispenses the beer when the lever is pulled.
Chiller or Cooler (optional): Keeps the beer cold as it travels through the system.
By understanding how these components work together, you can better manage and maintain your draft beer dispenser.
Essential Tools and Supplies for Beer Dispenser Installation
Before diving into the actual installation process, it’s important to gather all the necessary tools and supplies. The installation of a beer dispenser requires careful attention to detail to ensure it functions properly. Here’s a list of the essential tools and materials you’ll need:
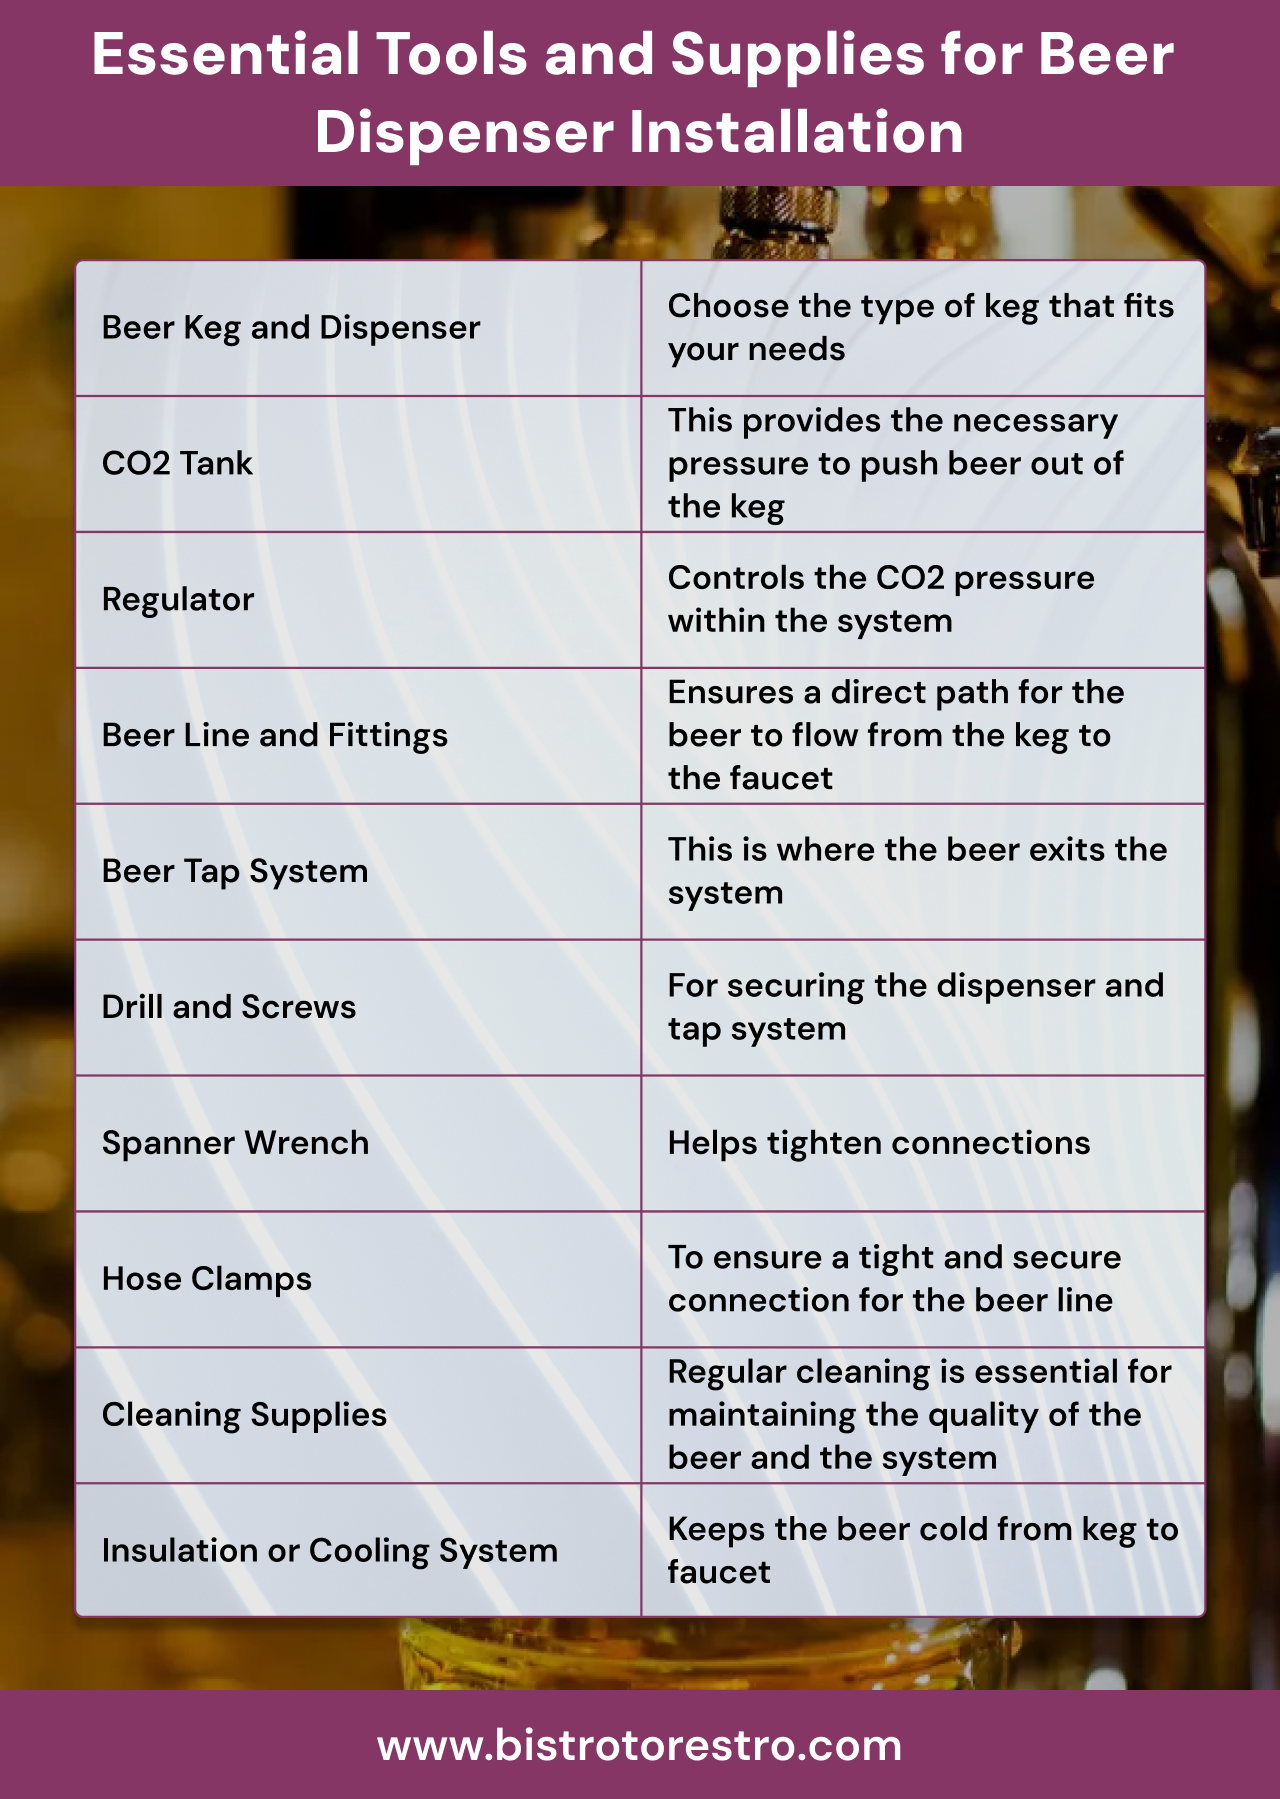
Once you have all these tools and supplies, you’ll be ready to move on to the installation.
Step-by-Step Guide to Installing a Beer Dispenser
Installing a beer dispenser is a rewarding DIY project, whether you’re setting up a home beer tap system or installing a more complex commercial beer dispenser. Follow these steps to ensure a successful installation:
Step 1: Prepare Your Space
Choose a location that can accommodate the size of your beer dispenser. For a commercial beer dispenser, you’ll need a more spacious setup. Ensure that the area is well-ventilated and close to a power source, if your system requires refrigeration.
Step 2: Install the Keg
Place the beer keg and dispenser in a sturdy location. For a commercial beer dispenser, you may need a refrigeration unit to keep the keg cold. If using a growler beer dispenser, position the growler correctly to allow the beer to flow freely through the system.
Step 3: Set Up the CO2 Tank
Attach the CO2 tank to the regulator, which will control the pressure for your system. Ensure the tank is placed securely and is easy to access for refilling. Connect the regulator to the keg, ensuring that the pressure is set to the recommended level (usually between 10-14 PSI, depending on the beer type).
Step 4: Connect the Beer Line
Attach the beer line to the keg and to the beer dispenser faucet. Ensure all connections are secure, using hose clamps to prevent leaks.
Step 5: Install the Faucet
Install the beer dispenser faucet into the countertop or mounting location. Use a drill to make a hole if necessary, and secure the faucet using screws. Make sure the faucet is level and positioned for easy pouring.
Step 6: Test the System
After everything is connected, open the CO2 tank and test the system. Pull the tap and check if the beer flows smoothly. If the beer is foamy or not flowing correctly, adjust the CO2 pressure or check for any leaks in the system.
Step 7: Ensure Proper Cooling
If you're using a cooling system, make sure the beer remains at the ideal temperature (around 38°F or 3°C for most beers).
By following these steps, your beer dispenser installation should be a success.
Common Beer Dispenser Installation Mistakes to Avoid
While installing a draft beer dispenser may seem straightforward, there are several common mistakes that can affect performance. Here’s what to avoid:
Incorrect CO2 Pressure: Too much or too little CO2 can cause the beer to foam excessively or result in flat beer. Ensure you follow the manufacturer’s guidelines for the correct pressure setting.
Leaks in the System: If any fittings or connections are loose, they can cause leaks, affecting the quality of the beer. Always double-check the connections and tighten them properly.
Improper Cooling: If the beer isn't kept at the right temperature, it will affect the taste and carbonation. Make sure the beer line is insulated and that your keg is kept cool.
Neglecting Cleaning: Failing to clean your beer dispenser faucet and lines regularly can result in dirty beer and an unpleasant taste.
Poor Placement of the Faucet: Make sure the faucet is positioned at a comfortable height and in an accessible location for easy pouring.
Avoiding these mistakes will help ensure your beer dispenser operates efficiently.
The Importance of Regular Maintenance for Your Beer Dispenser
Regular maintenance is crucial for keeping your beer dispenser in top condition. Neglecting maintenance can lead to poor performance, bad beer taste, and potential system failures. Here’s why maintenance is so important:
Preserving Beer Quality: Regular cleaning prevents beer build-up and mold growth in the lines and faucet, which can negatively impact beer flavor.
Prolonging the Life of Your Equipment: Proper care and cleaning help extend the lifespan of yourbeer tap system, saving you money in the long run.
Preventing Malfunctions: Regular checks for leaks, pressure, and cooling issues can prevent costly repairs and downtime.
Cleaning Your Beer Dispenser: Best Practices
Cleaning your beer dispenser is essential to maintaining beer quality and system performance. Here's how to clean your beer dispenser effectively:
1. Disassemble the System
Remove the beer keg and dispenser from the system. Disconnect the beer line and faucet from the rest of the setup.
2. Clean the Beer Line
Use a beer line cleaner or a mixture of warm water and mild soap to clean the beer lines. Run the cleaner through the lines for 10-15 minutes. Rinse thoroughly to ensure there’s no soap or cleaner residue left behind.
3. Clean the Faucet
Remove the faucet and soak it in warm water and cleaner for a few minutes. Scrub the faucet with a brush to remove any build-up or residue.
4. Reassemble the System
After cleaning, reconnect all the parts and make sure everything is dry before reattaching the keg.
5. Test the System
After cleaning, test the system to ensure the beer flows correctly and there are no leaks.
By following these cleaning practices, you can ensure that your beer dispenser is always ready for use.
Troubleshooting Common Beer Dispenser Issues
Even with the best setup, issues may arise with your draft beer dispenser. Here are some common problems and solutions:
Beer is Too Foamy
Check the CO2 pressure; it may be too high. Adjust it to the correct level. Ensure the beer is properly chilled.
Beer Won’t Flow
Check for leaks or blockages in the beer line. Make sure the CO2 tank is pressurized and working.
Flat Beer
Check the CO2 level and ensure it’s adequate for carbonation. Inspect the beer lines for any blockages.
Enhancing the Performance of Your Beer Dispenser
To get the best performance from your beer dispenser, consider the following tips:
Invest in a Gas Pump Beer Dispenser: For higher volume or commercial applications, a gas pump beer dispenser can provide greater consistency and reliability.
Use Insulated Beer Lines: Insulating the beer lines helps maintain the correct temperature and prevents beer from warming up as it flows to the faucet.
Regularly Check CO2 Pressure: Proper CO2 pressure ensures your beer remains properly carbonated and avoids flat or over-carbonated beer.
A beer dispenser is a great investment whether you’re a beer enthusiast at home or operating a business. Installing and maintaining it properly will ensure that you enjoy the best draft beer experience possible. By following the steps in this guide, from installation to troubleshooting and cleaning, you’ll be well-equipped to handle any challenges and keep your beer tap system running smoothly.
Looking to install a beer dispenser and need the right accessories? BistroToRestro is your go-to source for commercial beer accessories, including keg couplers, beer tap handles, and drip trays. We also offer a variety of disposable party drinkware, liquor accessories, serveware, and wine accessories to complete your bar setup. Explore products from top brands and browse our extensive collection of food & drink essentials.
FAQs
How do you clean a beer dispenser?
To clean a beer dispenser, remove the beer keg and dispenser, clean the beer line with a cleaning solution, soak and scrub the beer faucet, rinse everything thoroughly, and reassemble the system.
What do I need for a beer pump?
For a beer pump, you'll need a beer keg, CO2 tank, beer tap system, beer lines, and a beer dispenser faucet.
What pressure is a beer dispenser at?
A beer dispenser typically operates at 10-14 PSI, depending on the beer type. Adjust the CO2 pressure to ensure proper carbonation and flow.
What temperature should a beer dispenser be?
Most beer dispensers should be kept at around 38°F (3°C) to ensure the beer is served cold and fresh.